Wednesday, March 22, 2023

Everleigh Hope: Mini Notebook


Hey! It's Wednesday again, and I got a super cute mini notebook to share with you today featuring this month's kit: Daffodil.

Title

I started out by trimming the bicycle paper to a 5 1/2" x 8", and folded that in half. I selected the light blue daffodil paper, trimmed it to 1" by 5 1/2", and folded it in half. Then, I took 3 white cardstock and trimmed it to a 5 1/2" x 8", and folded it in half. I glued the daffodil paper to the bicycle paper. Added the white cardstocks inside, and ran it through the sewing machine to adhere the whole book together.


Next, I added the tags, labels, and tucked a die cut "happy circle" to the left of my page.


Last, I added the rainbow, daffodil, the sentiments, and wrapped twine in the middle of my notebook.


Hope you like my project, and am inspired to make one too!

SUPPLIES: Everleigh Hope; Others: sewing machine, thread, glue, and dimensional adhesive.

Friday, March 17, 2023

Oh Joy Layout with Cricut file included!


Happy Friday everyone!! Today's challenge was: When you are short on embellishment, and want to use up the rest of the embellishments you have left. In my case, I had 3 leftover Bella Blvd.'s clouds that were just too cute not to use. So, what did I do?? Create matching embellishments with my Cricut machine!! You can also duplicate this layout if you have a Cricut machine and Cricut Design Studio downloaded here: CRICUT DS FILE.

Oh Joy

I started this layout with a stripe background.


I grabbed all the following colors to cut out embellishments with my Cricut machine.


I framed my photo with whit cardstock.


I embellish with Cricut to my liking (or, as planned in Cricut DS).


Hope you loved my layout, and will give this a try! ;)

SUPPLIES: Cricut machine; CRICUT DS FILE; Others: sewing machine, thread, glue, and dimensional adhesive.

Thursday, March 16, 2023

San Pedro Layout


It's THURSDAY!! I started a new kdrama called, Our Blooming Youth. It's a historical. I enjoy Park Hyung Sik in Strong Woman Do Bong Soon. But I gotta say, I am on episode 4. Not really feeling romantic development of the main leads just yet. It feels quite awkward especially when he was so aggressive throughout the first few eps. I do understand he was the "king," and he thought she was trying to kill him. Still, I thought that maybe the writer shouldve had his army do the aggressive hands on her part..

San Pedro

I started this layout by layering white cardstock on top of light blue pattern paper. From Shimelle's True Stories, I took the frames pattern paper and fussy cut the frames.


I moved the pieces around my page to get an idea of where I want it to be placed, so that I can add a bit of mix media. I grabbed a few matching gelatos, and rubbed on some color using a sponge. I adhere the frames, and added stitching.


Added my photo, title, and journaling.


Last, I added rosette and other embellishments.

SUPPLIES: Pattern paper: Shimelle's True Stories collection; Gelatos: Faber Castell; Others: sewing machine, thread, glue, and dimensional adhesive.

Wednesday, March 15, 2023

Everleigh Hope: Sunshine Layout


Hello! Hello! It's Wednesday, and I have a scrapbook layout to share with you using the March kit, Daffodil.

Sunshine

I started this layout using a white solid cardstock for the background. Then, I layered on the cloud paper and rainbow paper to the right side of my page. I also framed my photo with the leaf paper along with the polka dot paper.


Next, I added the tags and labels to the top of my photos, and near the bottom left corner. After that, I added the hearts and rainbows along with my journaling to my page. I added some stitches here and there.


Last, I used my electronic cutting machine to cut out two Everleigh Hope's daffodils, and attached them to my page. Hope you love my page and don't forget to check out all of Everleigh Hope's collections!

SUPPLIES: Digital Collection: Daffodil by Everleigh Hope; Others: sewing machine, thread, glue, and dimensional adhesive.

Tuesday, March 14, 2023

Go With God Layout


It's Tuesday!! I am counting down the days until our kids are off for Spring Break!! For some reason, our Spring Break is always super late compared to other districts and states.

Go With God

For this layout, I started out by dabbing a few gelato colors on white cardstock for my background. I love LOVE using gelatos due to it not being too fussy, and it doesn't buckle my non-specialty cardstock.


I used PinkFresh scallop circle dies and diecut a bunch of circles on white cardstock.


I started to build my background by backing up the circles with pattern paper. Added my photo to the layout.


Last, I started to embellish with Illustrate Faith ephemera.

SUPPLIES: Circle Dies: PinkFresh; Rosette Dies: Tim Holtz; Gelatos: Faber Castell; Others: sewing machine, thread, glue, and dimensional adhesive.

Monday, March 13, 2023

Cricut With Me


If you have a Cricut machine, and don't know what to do: click on one of the interested photos. You will have access to instructions to make the same project along with the Cricut Design Studio file. :)

Sketches

Under Construction!

About Me

https://paperandi07.blogspot.com

Thursday, March 9, 2023

Love Love Love Layout


Happy Thursday! I have been searching and searching for an evening dress for a wedding that is coming up soon, and was having such a hard time finding one. I finally found one yesterday, but I have to sew it up due to it being way too long. Ah well, the price was good, and the dress is gorgeous.

Love Love Love

I started this layout with a white background. I used We R Memory Keepers spray mist tool to add some blue color to my background.


I layered on pattern paper on top of pattern paper, and added my photo. I also added vellum. Before adhering them down, I stamped the sunflowers, butterfly, and sentiment.


Then, I embelish to my heart content, and added my title.

SUPPLIES: Pattern papers: Park Lane by Joann; Cardstock stickers: Bella Blvd.; Stamps: Viki Boutin; Others: sewing machine, thread, glue, and dimensional adhesive.

Thursday, March 2, 2023

Pretty Layout


It's Wednesday. Life's been a bit rough these past days, but God is helping me hang in there.. I believe that God allows things to happen for a reason, and sometimes (or, most of the time) we might not understand it. As I reflect my past, I start to see why God allow certain things to unfold, and His reasons are always perfect even if we don't understant it during that time. So, if you're having a hard time today or been having a hard time, just know this: YOU ARE LOVED (by God), God understands you, and keep hanging on. He will take care of you as long as you believe in Him. It will work out.

Pretty

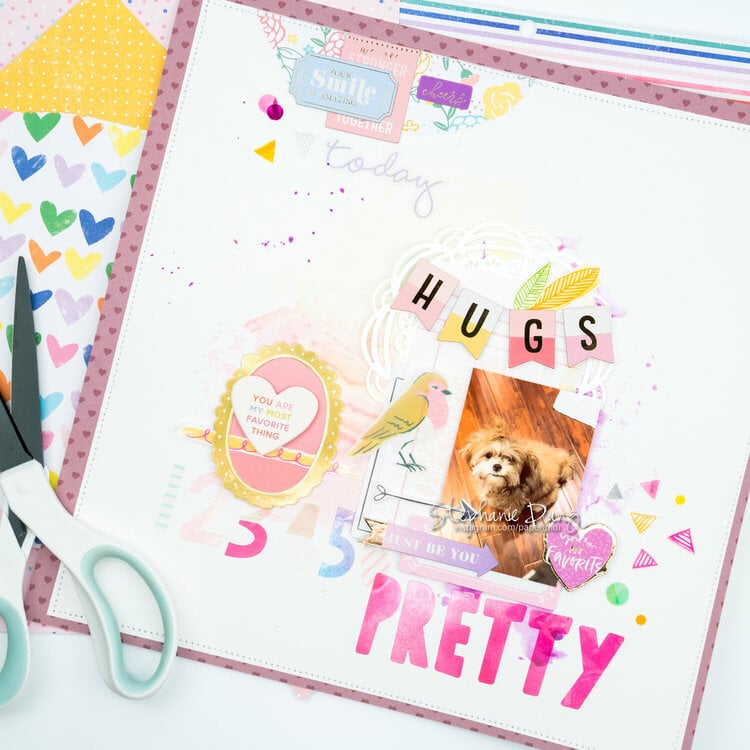
For this layout, I did a bit of mixed media once I figured out where I wanted my photo. I learn my lesson from the past, so I added gesso and let that dry before anything. This step is necessary if you are using normal cardstock. It helps prevent paper buckling, and provides stability. As for technique, I used the kissing technique where you add a little bit of paint to a sheet of plastic or something sturdy, and water it down just a little bit. You flip the plastic over the top of your page and gently smoosh the colors unto our layout, pick it up, move it around, and do it all over again. I used 3 different colors for this layout. Sometimes, people add all three colors on the sheet of plastic, but I did color by color. I just find that I have more control over the colors, and able to add more color easier this way.


I typically start to layer my photo(s) with pattern papers throughout my layout. However, I only use a small torn sheet at the top left of my page.


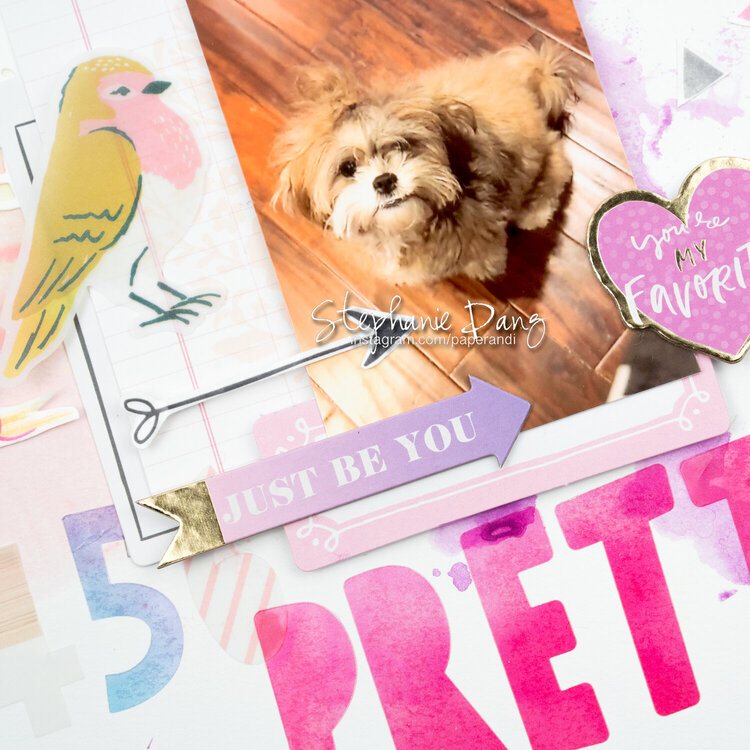
Last, I played around with embelishments and added a diecut doily to the back of my photo.

SUPPLIES:Pattern paper: DCWV; embelishments: a combo of PinkFresh and Spellbinders.Others: sewing machine, thread, glue, and dimensional adhesive.